Description
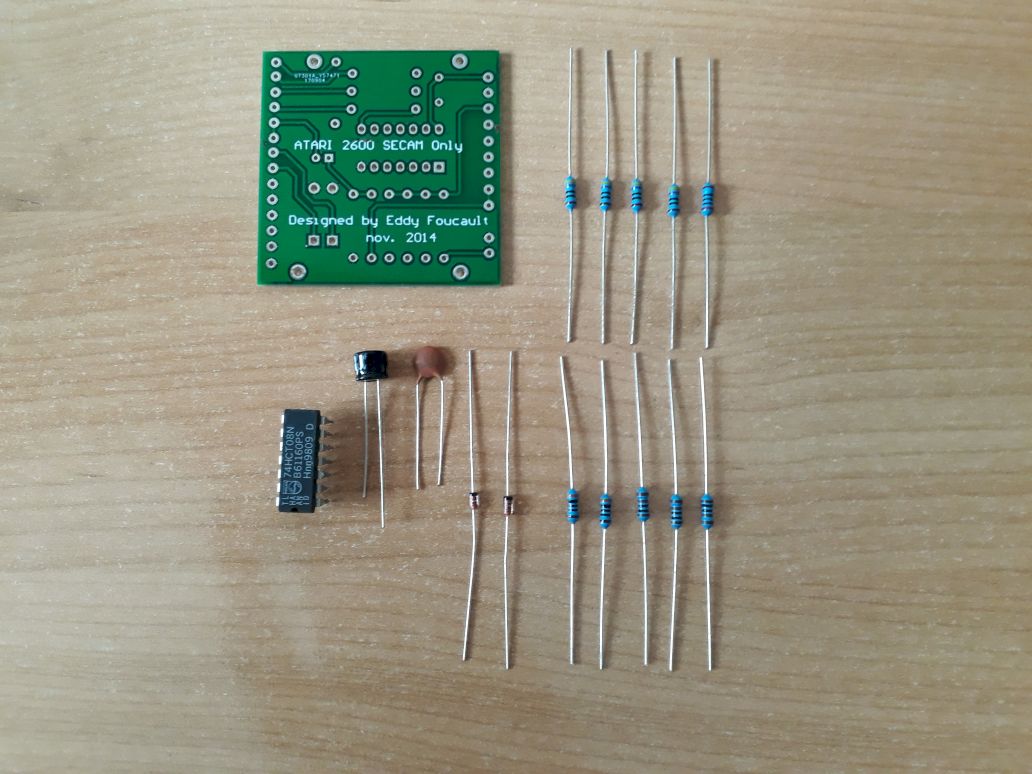
The video converter for Atari 2600 SECAM comes as a DIY electronic project. Knowledge in electronic component soldering is required to complete this project. Although quite simple, this project is not recommended for beginners in electronics, because it requires delicate soldering on the electronic board of the Atari 2600 console.
If you rather have the PCB with the components already soldered, see the Assembled Version.
A few years ago, Eddy Foucault invented a video converter for Atari 2600 SECAM version, which adds an RGB video output with a Scart socket to the console. This video adapter allows you to connect your Atari 2600 console to a modern TV set (LCD flat screen TV or recent video projector). If your TV or projector does not have a SCART socket but only HDMI, you will need a SCART to HDMI converter.
You can find his very well documented project on his blog (in French), which I recommend.
With his authorization, I had the PCB made. Thank you Mr Eddy!
Warning: This video converter works for Atari 2600 SECAM versions, but also PAL and potentially NTSC. But using this mod on a PAL console, such as the Atari 2600 Jr, you will only get a 8 color palette. Indeed, the Atari 2600 SECAM can only display 8 colors, against 104 for the PAL version and 128 for the NTSC version, hence "fluorescent" colors with the SECAM version. For more information read here: https://mechafatnick.co.uk/2017/09/22/the-secam-2600-was-a-thing-of-maligned-beauty/ and here: http://spiceware.org/atari_ntsc_pal_secam.html
The PCB and the components are provided. You will also need to solder wires between the converter and the motherboard of your Atari 2600 console. This operation is delicate and not recommended for beginners in electronics (the first Atari 2600 on which I tried it still remembers).
You will also need a SCART cable and socket for this assembly (not supplied).
Assembly instructions are provided after purchase.
12,00€Add to cart
PCB assembly videos by CabriDIY (French)


F C. (Client vérifié) –
Great kit, easy to put together and install with clear instructions.
Michael Marugan (Client vérifié) –
Parfait, très facile à monter. Les instructions données sont claires.
gregory devimeux (Client vérifié) –
Très bon kit simple à assembler et manuel très clair, et je parle même pas de la qualité de l’image 🥰
Davide B. (Client vérifié) –
Very fast shipment, thank you!
Vincent L. (Client vérifié) –
Kit impeccable, prix très raisonnable et envoi super rapide.
Pinau Julien (Client vérifié) –
Super kit, hyper simple à installer avec le pas à pas et super assistance de l’équipe si problème. Rien à redire!
Gery SERET (Client vérifié) –
Karim B. (Client vérifié) –
Le convertisseur marche tres bien. J’ai du refaire le cablage car les fils de ma peritel etait inversé, et c’est sur la synchro et le son ! mais ensuite nickel.
Klyde (store manager) –
Merci Karim, oui il est courant que des fils soient inversés dans les Péritel, ce qui peut être agaçant. Bravo pour la réalisation du kit !
David D. (Client vérifié) –
Parfait
Olivier (Client vérifié) –
Top et ça fonctionne parfaitement. Livraison super rapide.
Pour info je ne sais pas si c’est courant mais sur 2 de mes péritels les fils 19 & 20 étaient croisés ainsi que les 3 & 6 et 1 & 2 (un doute sur ce dernier toutefois). Symptômes : pour 2 et 6, pas de son. Pour la synchro (20), l’image est comme balayée en permanence verticalement.
Les soudures à réaliser ne sont pas hyper compliquées, bien plus simples que sur pleins de consoles plus récentes.
Klyde (store manager) –
Merci Olivier. Effectivement il faut bien faire attention aux connexions du PCB, car avec certains câbles Péritel des fils sont « inversés ». C’est d’ailleurs mentionné dans la partie « dépannage » de la notice de montage.
vincent dupaquis (Client vérifié) –
Emmanuel Quentric (Client vérifié) –
Anonymous (Client vérifié) –
Vendeur rapide et sérieux. Transaction idéale.
Gaëtan Pointaux (Client vérifié) –
Philippe NICOLAS (Client vérifié) –
Expédition rapide et avec un peu de patience et en suivant bien les explications incluses, vous obtiendrez la plus belle image de votre Atari 2600…